Best App For Notes Mac
- Best App For Notes To Text
- Best Notes App For Macbook
- Best App For Taking Notes On Macbook Pro
- Best Note Taking App For Windows 10
Apr 19, 2019 We have listed below ⬇️ best 🏆 14 Note taking apps available on (iOS, Android, Mac, iPad & Windows) to deliver a productive way of taking notes, maintaining lists, and penning down ideas. Best note taking app should have smooth UI, offer excellent user experience, features like syncing, sharing, and backup. SimpleNote ZohoNotebook Boostnote Colornote Notion Milanote GoogleKeep Bear Quip. What’s The Best Note Taking App For Mac? The first reliable note-taking application for Mac is Apple Notes. Since Apple Notes is a part of Apple’s productivity suite it comes pre-installed on every modern-day mac computer. You can attach all sorts of media files like photos, videos, documents scanned from your iPhone, hand.
Sticky Notes has been a part of the Windows operating system for years. It’s a useful utility, lets you pin quick thoughts and notes on the desktop. In 2018, Microsoft delivered the much-needed makeover to Sticky Notes with sync capabilities, file attachment, and a complete redesign. At the same time, the company made sure the users get to access Sticky Notes on rival OS, including Android, iOS, and Mac.
The added syncing function is useless if you can’t access or create Sticky Notes on Android, iOS, or web. To counter the problem, Microsoft has making Sticky Notes available on iOS and Android via other apps and on Mac using the Outlook platform. The company is also leveraging the Microsoft Launcher app on Android for deep integration of Stick Notes.
In this post, we are going to talk about how to access Sticky Notes on Mac, iOS, and Android. It’s not as straight forward as downloading the app from the App Store or the Play Store. Let’s get started.
Use Sticky Notes on Mac
From Outlook App
Apple does provide a capable alternative called Stickies on the macOS. But it’s basic, doesn’t have syncing and it’s only available on the Mac. There is no way to access them on other platforms. Enter Sticky Notes.
There are two ways to use Sticky Notes on the Mac. Microsoft is using the Outlook app for Sticky Notes integration. Follow the steps below.
Step 1: Open the Mac App Store and download the Outlook Email app.
Step 2: Open Outlook Mail and sign in using the Microsoft account credentials.
Step 3: After the successful login, move to the bottom menu bar.
Step 4: Here, you will see the mail, contacts, calendar, tasks, and notes.
Step 5: Tap on the notes icon and it will open the sticky notes menu in the app.
Click on the notes to view or edit them. To create a new note, go to File > New Note or use the ‘Command + N’ keyboard shortcut to compose a note. Add a title and content to it and hit Command + S shortcut to save the note. You can view and arrange the notes via dates.
Download Outlook for MacAlso on Guiding Tech
9 Best Sticky Notes Productivity Tips for Windows 10 Users
Read MoreUse Outlook Web
In recent years, Microsoft has radically improved the Outlook web functionalities. From a single place, you can access the major Microsoft services such as Mail, Calendar, To-Do, Contacts, Skype, and more.
As it’s dependable on the web, the trick lets you access Sticky Notes on Chrome OS and Linux too. Follow the steps below to access Sticky Notes on the Outlook web.
Step 1: Open any web browser and navigate to Outlook.com.
Step 2: Login using Microsoft account credentials and it will take you to the default mail page.
Step 3: From the Outlook Mail, go to Folders > Notes.
Step 4: Here, you will see the Sticky Notes list.
Step 5: Tap on the notes to add content, change color, or even delete it.
Step 6: To create a new note, navigate to the upper left corner and select ‘New Note’ option.
Using Sticky Notes from the Outlook web is a much better experience than the standard Outlook app from the Mac Store.
Use Sticky Notes on iPhone
Best App For Notes To Text
Here is where it gets confusing. Unlike on desktop, you can’t access Sticky Notes from the Outlook app on the iPhone. Instead, the company has integrated Sticky Notes with the OneNote app for the mobile.
Step 1: Download the OneNote app from the App Store.
Step 2: Sign in using Microsoft account and synchronize the notebooks.
Step 3: Here, you will see the separate Notes section at the bottom.
Step 4: Select it and here you will see all the Sticky Notes in it.
Users can create new notes, change color, format the notes using the default editing options, and more.
Download OneNote for iOSAlso on Guiding Tech
11 Best OneNote Tips and Tricks for Power Users
Read MoreGet Sticky Notes on Android
There are two ways to use Sticky Notes on the Android operating system. You can either use the OneNote app or opt for the Microsoft Launcher to access Sticky Notes on Android. Speaking of Microsoft Launcher, follow the steps below.
Step 1: Open the Play Store and download the Microsoft Launcher app.
Step 2: Set the launcher as the default on Android from the device settings.
Step 3: Swipe left on the Microsoft Launcher and sign in using the Microsoft account credentials.
Step 4: Go to the Glance tab, and here you will see the Notes widget in the menu.
The notes widget will synchronize the notes from the Sticky Notes app. You can create and edit the existing notes from the same widget.
Alternatively, you can use the OneNote Android app to get Sticky Notes on the Android OS. The steps for it are identical to its iOS counterpart.
Best Notes App For Macbook
Download Microsoft Launcher for AndroidDownload OneNote for AndroidAlso on Guiding Tech
#sticky notes
Click here to see our sticky notes articles pageUse Sticky Notes Everywhere
As you can see from the steps above, a user can access Sticky Notes on all the platforms, including Mac, Android, iOS, and web. It’s useful for those living in a cross-platform ecosystem. I mostly use it to jot down quick thoughts on my iPhone and Windows laptop. What about you? Sound off in the comments section below.
Next up:Sticky Notes now working for you on Windows 10? Use the tricks below to fix the issue.
The above article may contain affiliate links which help support Guiding Tech. However, it does not affect our editorial integrity. The content remains unbiased and authentic.Read NextTop 8 Ways to Fix Sticky Notes Not Working on Windows 10Also See#windows 10 #Microsoft
Did You Know
Brian Eno is the brain behind the famous Microsoft sound.
More in Mac
Top 5 iCloud Drive Alternatives for iPhone and Mac
Taking notes on a Mac is as simple as opening Notes and starting to type. But the best way to take notes actually depends on your own personal habits and workflow.
Some people are better with sticky notes that stay on your screen all the time, or an app that syncs seamlessly with Evernote. If your notes tend to turn into blog posts, an app like MarsEdit can keep them organized until they’re ready to publish.
Setapp collection is packed with useful apps that might fit your unique way of note-taking better than a one-size-fits-all solution like Apple’s own Notes. With over 150 apps to choose from — and a free trial — you’re bound to find the best app for jotting down your thoughts. Here are our favorites.
Best App For Taking Notes On Macbook Pro
Best note-taking apps for Mac
Get the most out of your notes - with a huge set of top Mac apps in one pack!
Capture ideas with Unclutter
Best Note Taking App For Windows 10
Unclutter is perfect for capturing the smallest germ of an idea, since it works as both a sticky notes app and a clipboard manager. Because it’s always open, you can write down an idea the second you have it. Unclutter’s notes are sticky because they never go away, and the interface is even better than default sticky notes on the desktop since Unclutter doesn’t clutter up the view when you’re working in other apps.
To access Unclutter, you can just mouse to the top of your screen and scroll down (or choose your own key command), and its three-pane layout appears, with sections labeled Clipboard, Files, and Notes.
In Clipboard, you’ll see a list of everything you’ve copied to your Mac’s clipboard, ready to re-copy and paste whenever and wherever you need. You can star favorite items to keep them accessible here forever.
Files is a handy place to drop files you need an easy access to, like things you’re working on right now.
Mar 06, 2019 Open Mac Mail application. Select Mail Accounts. On the Internet Accounts page, select Exchange from the list. In the next window, fill out all necessary information and click Sign In when done. 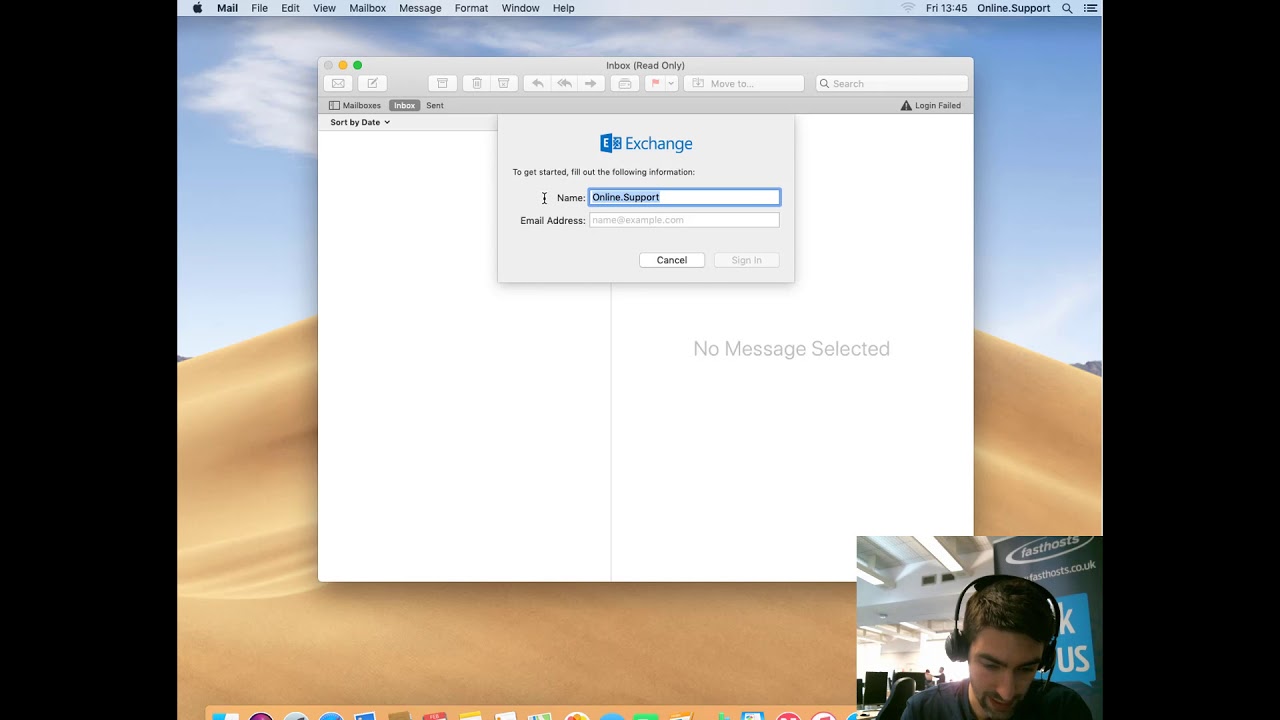 If you have Outlook for Mac, you can use it to access your Exchange account. See Add an email account to Outlook for instructions. Set up Exchange account access using Mac OS X 10.10 or later. If you're running Mac OS X version 10.10 or later, follow these steps to set up an Exchange email account: Open Mail, and then do one of the following. Via the Mail app configuration assistant: Launch the Mail app on your device. From this point onwards, this guide will only cover configuration using the Mail app. Step 1: Add the account. Once you have launched the Mail app on your device, you can add an account in two different ways: When you open the app for the first time: A window will. In macOS, many online accounts, including Exchange, can be set up in a central store that is available to installed applications. To set up your Exchange Online account with macOS: Set up the central store: Click the Apple menu, and select System Preferences. Double-click Internet Accounts. You can add a shared Exchange Online mailbox to your Apple Mail app on macOS desktops and laptops. Open the Apple Mail app. Click 'Mail' on the Mac system bar at the top of the screen and select 'Preferences' from the drop-down menu. Click on the '+' symbol at the bottom left of the pop-up window and select 'Other Mail Account'.
Unclutter’s Notes pane is a text field where you can type out notes and also drag text and links into. You can keep one long-running note to yourself or create multiple notes and view them in a list — the Search field searches the full text of all of your notes, so you can always find what you’re looking for. All panes are easy to resize to give yourself more room.
Unclutter is easy to fit into your workflow since it’s always there, and the search field helps you find things later. Dropbox integration even syncs your Unclutter files and notes across multiple Macs. When you want to turn your thoughts into something more edited, you can choose another note-taking app from Setapp.
MarsEdit and Strike for blogging
MarsEdit makes it easy to create content, cleverly edit what you write, and integrate with WordPress as well as other blog publishing services right from the app. Besides giving you a place to write in Markdown or Rich and Plain text, MarsEdit lets you build and format robust blog posts, complete with links, images, and other media. You can add tags and schedule your posts to go live anytime.
Extfs for mac by paragon software download. Improved performance and stability. Full Specifications What's new in version 4.0.16.
MarsEdit even makes it easy to gather links and media to blog about. It has a Safari extension that lets you save URLs and start blogging instantly once you find something worth writing about.
If you’re looking for a writing tool that allows to collaborate on a doc, you should go with Strike. This effortless text editor lets up to 10 people to work on the same content in real time.
Improve your writing with Ulysses
Ulysses is a writing app with outstanding organizational features, so you can move from notes to an outline to a full manuscript. In fact, Ulysses is a popular app for Mac users participating in NaNoWriMo, a month-long exercise that encourages people to write a novel. It has all kinds of features to get you to write more, from flexible themes to eliminate distractions, to writing goals that count words written.
You can use Ulysses to post to a WordPress blog, export Word documents, or even format an entire ebook. But at the most fundamental level, it’s a great note-taking app because you never have to save anything, and your writing can sync between multiple Macs and iOS devices via iCloud or Dropbox. Your notes can contain images, keywords, and PDFs. The search function is incredibly thorough; for example, you can find keywords in notes created before a certain date, in case you want to see how your thoughts about something have evolved over time.
Take study notes with Studies
While other note-taking apps are flexible enough to handle work and personal topics side-by-side, Studies is created especially for those in academic settings. It’s designed to take your notes and turn them into study notes, which are basically flashcards on steroids.
Instead of a traditional two-sided flashcard for memorizing terms, the study notes in Studies can have as many “sides” as you need. They can contain text, images, videos, even audio. This makes them flexible enough that you can create study notes for any subject, from accounting to zoology. You can share study notes with classmates or even download pre-written note sets from Quizlet.
Then, you can use Studies to quiz yourself. The app can set up a schedule for you, based on prepping for an exam or just learning the material as quickly as you can. It chooses notes to study every day, and the cards you got wrong will re-appear more frequently in future sessions, so you can get it right.
Setapp puts all best note-taking apps together
All these note-taking apps are available in Setapp, so you have access to them all for your ideal workflow. You could start an idea as a sticky note in Uncluttered, paste it into Alternote, where you flesh out the idea a little more. That syncs it to Evernote, which you can also connect to Blogo, and turn that note into a full-featured blog post for the world to read.
It’s all up to you, and Setapp lets you focus on the work, instead of finding the right apps, buying them, and then buying them again for updates. Just consider subscribing once and then all you have to do is write.